

Few Halloween costume ideas are more timeless and easy to put together than Harley Quinn. Not only are her painted pigtails and smudged lipstick ripe for Instagram; they also don’t require the patience or skill needed for most Halloween makeup. Plus, with the upcoming Joker: Folie à Deux sequel hitting theaters this October, going as Gotham’s bad girl this year feels particularly of the moment.
So with that in mind, we teamed up with makeup artist Lijha Stewart (also known as the Queen of Halloween) to break down all the advice you need to nail Harley Quinn’s makeup. Read on for the full step-by-step tutorial.
How to DIY Harley Quinn Makeup
Level of difficulty: Easy. If you can smudge on some makeup and throw your hair into pigtails second-grade-style, you’ll be able to do this no problem.
Amount of time required: One hour, max.
What you’ll need:
-Your favorite matte foundation
-A contour stick
-Matte, loose powder
-Highlighter
-A rosy blush
-Your brow product of choice
-Red and blue eyeshadow
-Black and white eyeliner pencils
-Red and blue eye glitter (optional)
-Scotch tape (optional)
-False eyelashes (optional)
-Red lipstick
-Cotton swabs
-Black liquid eyeliner
-Red and blue hair chalk or hair paint
Step 1: Contour and highlight.

Katie Friedman
Even though Harley’s skin is really pale in the movie, to make it more lifelike and wearable, we contoured in a few key areas. Swipe a sculpting stick down your cheekbones, at your hairline, underneath your lips, and on your collar bones. Blend it out with your fingers or a buffing brush.
In an effort to still capture that angsty, washed-out look, set everything with a matte, loose powder and keep the highlighting to a strategic minimum, placing it only in certain places like underneath your brow bone and in the inner corner of your eyes.
Our favorite contouring kits: MAC Studio Fix Sculpt & Shape Contour Palette, E.l.f. Contour Palette
Step 2: Accentuate your brows.
Katie Friedman
For light or scarce brows, “it’s best to start with a brow wax so that any color you put on after sticks,” says Stewart. With a spoolie brush, apply a light coating of the wax, and brush hairs upward and outward. Then, with an angled brush, apply your desired shade in light strokes.
Our favorite brow products: Benefit Cosmetics Goof Proof Brow Pencil, Maybelline Eye Studio Brow Drama Sculpting Brow Mascara
Step 3: Smudge on eyeshadow.
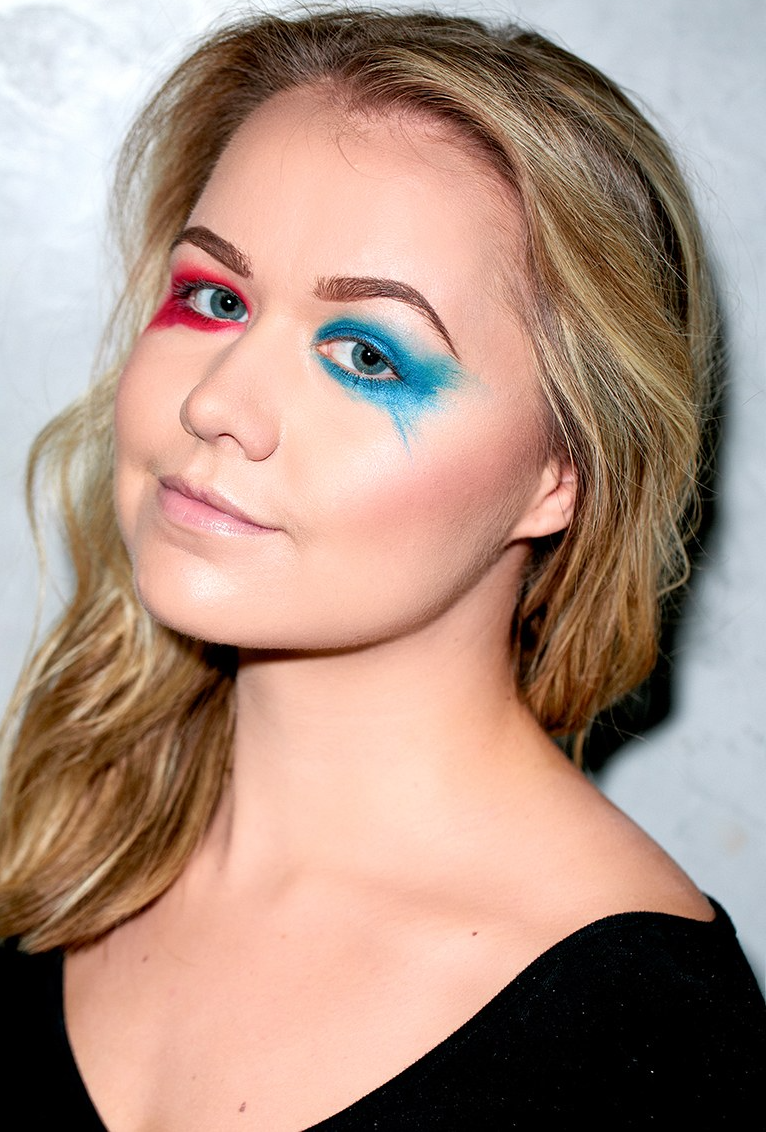
Katie Friedman
The trick to getting eyes like Harley Quinn’s isn’t in how you smudge your shadow—it’s about the pigment you use. While regular shadows are great and can sometimes offer intense color payoff, it’s best to opt for a cream here. You can literally smudge it on with your fingers if you’d like, but laying it on with a medium-size eye shadow brush will do just fine. To get that splattered effect, take whatever color is left on your brush from the initial application and drag it outward and downward. Oh, and don’t forget to use two different brushes for your red and blue. Mixing them will make both colors muddy—not the look you’re aiming for here.

 Share
Share Print
Print